My 5 Favorite Illustrator Tips, Tricks and Tools
by Jason Forrest
Insights / Graphic Design /

As a graphic designer and illustrator, I’m frequently using Adobe Illustrator.
Illustrator is the best way to quickly and efficiently compose vector based artwork for all kinds of projects, and there are a few tools that I find myself using for pretty much every project.
Let’s go through my favorite Illustrator tips and tricks (not in any particular order).
The Pathfinder Tool
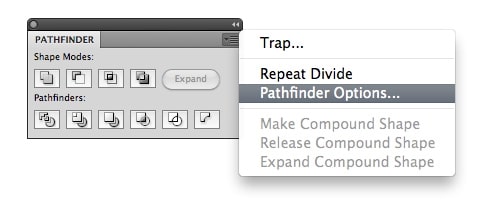
Find it here: Pathfinder Panel (normally on the right-hand side)
I use this the most when creating icons or complex shapes. You can make several components of an icon and merge them all together at the end to make one finished product. Or, if you need to, you can whittle away portions of the object without having to manipulate individual anchor points, like in the below:

The Blend Tool

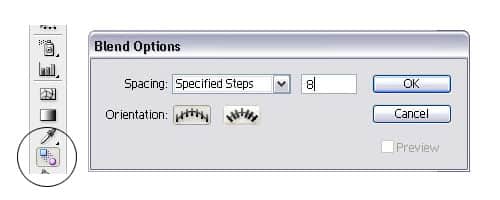
Find it here: Tools Panel (normally on the left-hand side)
The blend tool is usually used to create color fill blends with shapes, but I like to use it to quickly duplicate several objects at once. Below, you can see how I used it to create a custom scoreboard font by duplicating one dot into a grid of dots.

The Warp Effect Tool

Find it here: Upper tool bar > Effect> Warp
The warp tool is a quick and dirty way to modify an object’s appearance without having to draw the object yourself. It’s frequently used in logo projects, and usually paired with other effects (like the free transform tool or scale/skew). Look at it in action here:

Option (Alt) Key Duplication Shortcut

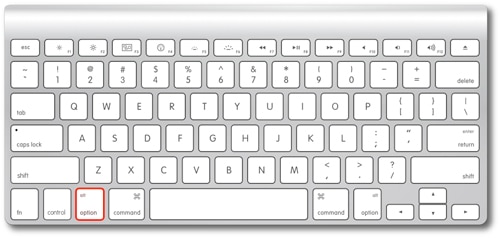
Find it here: Your keyboard
Keyboard shortcuts are crucial for efficiency, and this is one I use so frequently that I don’t consciously realize I am using it anymore.
So instead of constantly having to go to the toolbar to select copy and paste, simply hold down the Option (or Alt) key while the object is selected and drag the duplicate onto your artboard. Bonus: If you hold Shift as well, the object will stay vertically or horizontally aligned to the original.
Live Trace Tool
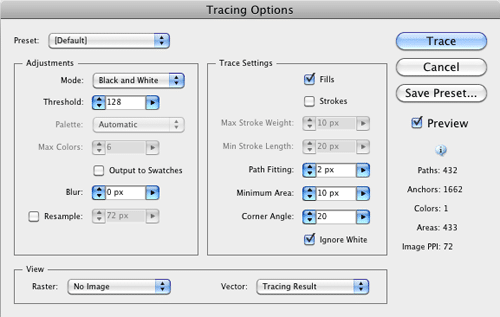
Find it here: Upper tool bar > Object > Live Trace > Tracing Options
I haven’t used this one as much as I used to, but when it is used it can add a really nice effect to a design. It’s also a great shortcut for when you need to do things like recreate a client’s raster logo into a vector file without having to individually recreate every single path by hand.
It isn’t perfect though, as it almost always requires some kind of manual adjusting, and is usually the best when paired with other effects.

Bonus Tip: Using Multiple Artboards
When you need to create multiple versions of one design, or if you are doing wireframes of several pages of one website, using multiple artboards is a quick way to export those files without having to manipulate individual layers for each version.
About Jason Forrest
Digital Ink tells stories for forward-thinking businesses, mission-driven organizations, and marketing and technology agencies in need of a creative and digital partner.
Other Stories You May Like